QR code graffiti

QR code graffiti planI thought we’d play with QR codes again today.  One of the advantages of having a school that is past it’s best-before date is that we could paint artwork onto the outside walls without having to get permission from PPP companies.

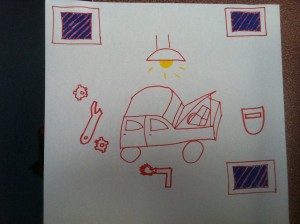
We talked about the things that make our school great and the things that are different and unusual about our school.  We agreed that the automotive course, the Digital Media Computing and computer games courses and the retail and hairdressing courses are all very unusual to find in schools.

We thought about what a QR code could link to, like a web address or text.  Maybe the text could have quotes from famous people or short poems.  Web addresses could link to youtube videos or the school website.  We also thought that the best way to do the QR code section of the image might be to use tiles.

With the S5 class we went for a walk around the school to look at areas that we could put artwork up but unfortunately the S3 pupils couldn’t go for a walk as it was pouring with rain.  Then we tried to plan out what our QR code graffiti could look like.  It’s actually quite difficult to plan out huge mural-sized art!
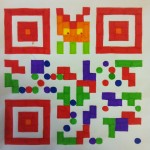
QR codenames

Today we didn’t have access to computers so we were in the Art department. I had printed out everyone’s name as a QR code so we traced over these and tried to make them look pretty.

We talked about contrast, which is the difference between two colours or shades. There is a strong contrast between black and white, they are very different. There isn’t a great contrast between orange and yellow.

We also talked about how QR codes work and about how there is between a 7% and 30% redundancy rate. This means that, with the size of code we were working with, 7% of it could be wrong or hidden and the code could still scan. We worked out that our code was 21 squares by 21 squares which means 441 little squares. 7% of 441 is 30. This seemed quite a lot!

A lot of our pictures didn’t scan. We think it was because of the colours used – not enough contrast between the code and the background.

Blurs and whooshes

Today we’re trying out the other blur effects after playing with Gaussian blur yesterday.

First we made a stationary car go wooosh by using a motion blur.  We used a lasso tool to select the car then inverted the selection.  Then we used a motion blur to make it look like the car is moving.

Motion blur, Photo from Stylish Cars blog


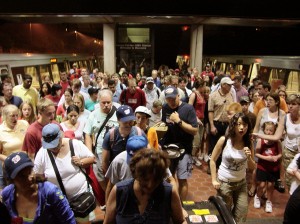
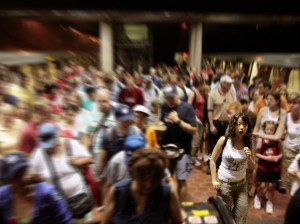
Next we tried out different blurs on a crowd scene.  Again, we selected a figure with the lasso tool, inverted the selection and applied the blur effect.

Original image by Ben Ben Schumin

Unfocus blur


Radial blur
 

Zoom blur


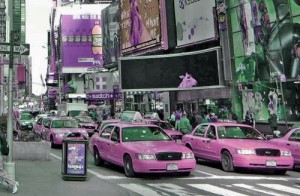
Finally we had a bit of spare time so we played about with Hue and saturation adjustments to change the colours of an image.  If we’d had more time we would have done an iconic yellow New York taxis against monochrome image.

http://acraftykindoftruffle.blogspot.co.uk/2012/06/ny-ny_12.html

Photo from acraftykindoftruffle.blogspot.co.uk

Brad Jolie and Angelina Pitt

I found out about an iPhone app called Faceswapper so I thought this would be a good idea of something to try in class.

We all found a photo of two people.  We used the mask tools to select the faces and paste each into separate layers then move them around.

We then flattened the layers and used a Gaussian Blur to blend the skin tones and merge the new face onto its new head.

Avatar Generators

Ms FarrellToday we have been discussing internet safety and choosing appropriate usernames.  Then we used avatar  generators to create pictures of ourselves.

Links from the fab Whiteboardblog:

Here are 16 websites that you can use to create fun avatars. Some allow you to save the finished creation as a jpg for free. If not, then use the print screen button to copy the screen, paste into a paint program, crop and save as a jpg. You could also use the Smart or Promethean camera tools to capture these images to your IWB files.

1. WeeMee -Create a mini version of yourself, add accessories. There’s plenty of scope for customisation of your avatar.

2. South park studio – turn yourself into a South Park character

3. HeroMachine 2.5 – Turn yourself into a super hero character. This would also be great as a part of a digital storytelling resource  or story starter.

4. Avatarizeyourself – turn yourself into a Na’vi from the movie Avatar

5. Ultimate Flash Face v0.42b a bit like a police photofit.

6. Make yourself in lego – Produce a lego character that looks like you. Or turn yourself into a Stormtrooper wizard. Is up to you

7. Simpsons Movie – Ever wanted to be a Simpsons character? Now you can create your own yellow-skinned doppleganger in the style of the Simpsons.

8Mr. Picassohead – become an abstract piece of work in the style of Picasso. Put your eyes and ears wherever you want!

9. BuiLD YouR WiLD SeLF – Create an avatar out of bits and pieces of humans and other animals – head, arms, legs, clothes, eyes, mouth, tail, wings, shells … just pick the parts you like and assemble them together

10.Mii Avatar Generator – create a Mii in the style of the characters found on the Wii computer console.

11. Clay Yourself – Clay Yourself lets you create a version of yourself in modelling clay. Lots of choice. (Thanks Lara for the link!)

12. ArtisanCam – A quick way of producing a sketch version of yourself. Limited choice of options.

13. Become an M and M – This lets you recreate yourself as an M and M sweet from the adverts. Probably going against the school’s healthy eating agenda…

Going somewhere new with Flickr

Ms Farrell in ParisToday we learned how to search for Creative Commons images in Flickr to find a photo of a location we wanted to go to.  Then we got a photo of ourselves (or maybe someone else).  We used the mask selection tools to select the image of ourselves then copy and paste it into the location image.  We also looked at adjusting the brightness and contrast if necessary.

Image masks and layers

The S5 pupils today learned how to use mask tools in Paint.net to select an area in an image, add layers, duplicate the selected area into a new layer, modify the size and shape (and constraining the shape using the Shift key).

They have learned how to use the rectangle and ellipse select tools, the magic wand and the lasso.  They learned how to use Ctrl and Alt to add or subtract from the mask.