Photography and text tricks


Today the S3 pupils did the photography task that the S5/6 class did the other day.  They then had a lot of fun tweaking and changing their photos!

After this we looked at how to make words have a photo texture background.  We searched for an image such as grass or sky or balloons or sweets.  In Paint.net we added a second layer and entered some text.  We used the magic wand (using the ‘global’ setting) to select all of the text.  We then hid the text layer and cut out the mask using Ctrl X.  Next create a new canvas and paste in your text.

Caitlin was a star and did another image with a shape rather than text which she pasted onto another photo (to give the effect of clouds in the sky being in a particular shape)

Blogs and still images

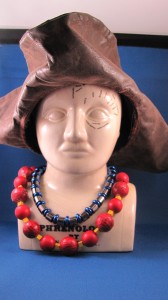
Photo studio booth with lights and a Phrenology head and an SLR cameraToday I demonstrated how to do some still photography.  I set up a photo area with lights and background cloth.  Pupils got to decorate ‘Fred’ and take photos.  We used the tripod flipped on it’s side to take Portrait photos rather than Landscape photos.  I suggested that pupils first take a photo of their name so we knew who’s photos were who’s but instead everyone dressed up ‘Fred’ in different ways.

When pupils weren’t having a turn using the camera they carried on blogging about some of the work they’ve been doing.

Glew Blogs

Today we set up blogs.  We are using WordPress blogs because it is used a lot as a way to create websites for small businesses and its an industry standard blogging tool.  It’s also free!

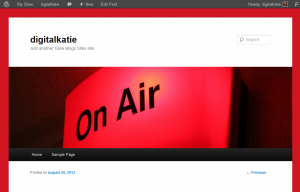
my Glew blog with an 'on air' imageWe thought we’d try the new Glew platform.  The advantage of using WordPress is if we want to move the blogs somewhere else we can easily export them out.

We setup our blog, tried changing the theme and appearance, added posts and added categories.  Everyone then tried to add posts talking about some of the work we have done so far.

You know when you’ve been Warhol’d

Today we played about a bit more with Hue and Saturation.  First the class went and researched pictures by Andy Warhol.  There were lots of images in the style of Andy Warhol so it took a little bit of clever searching to find authentic images by him.

Next we found an image that we wanted to ‘Warhol’.  Pupils chose objects (a tomato, an apple, a dog) and people (a different image of Marilyn Monroe, Einstein, Will Smith and some others)
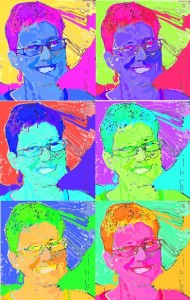
We then turned our images into Warhol works of art!  There is a great step by step tutorial available here.  We didn’t worry too much about sizes and increased the canvas size later by multiplying the image height and width by 2 or 3 or 4.  The most important thing to remember is to put each copy of your painted image onto a different layer.

Lastly we researched definitions of Hue and Saturation.  Hue is another word for colour, like red or yellow or green or turquoise.

Saturation is how much of that colour there is.  For example I could put a drop of red ink (the hue would be red) onto a piece of paper and it would spread out and turn the paper pink.  If I put lots of drops of ink onto the paper it would turn more red.

There is also lightness (or brightness) which is how light or dark the colour is.  If you see a red object in the dark it looks a different colour of red than if you turn a light on in the room.  It will also seem a different shade of red if you take the object outside and look at it in the sunlight.

An image of a pineapple in the style of Andy WarholUpdate: I did this class with the S5/6 class and used a pineapple as an example instead.  I’m quite pleased with it 🙂  We also had a look at other ways to produce Andy Warhol style images, such as inverting the colours and using the oil painting effect but we all agreed that this didn’t look as good as the way we did it.
Superheros

Our first lesson back on the computers after all the painting.  As a refresher we made name plates for the desks (everyone gets their own workspace now).

I got handed a flyer in town for Newsrevue which gave me an idea.  Today we made superhero images.

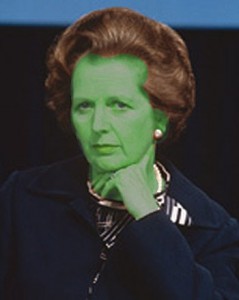
First we got a photo of someone and turned them into the Hulk. To do this we selected their face and skin and then played with the Hue, Saturation and Lightness settings in Paint.net.

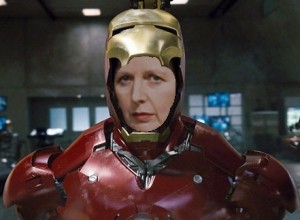
Thatcher as Iron ManNext we turned someone into Iron Man or Superman.  Again, this was a bit of revision of all the head-swapping work we did before the summer holiday.

Flipping the classroom

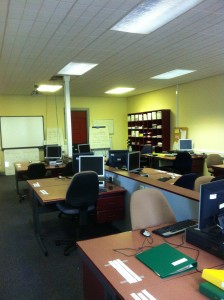
We came back after the holidays to find our classrooms in the middle of being painted and new flooring being put down.  We’ve used the opportunity to change around the layout of out main classroom to turn it from a computers round the outside of the room layout to something that looks a bit more like an open plan office.  Pupils will have a desk to themselves, well, they’ll share it with a couple of other pupils from other classes.

The other computer room is used mainly by other departments so today the pupils helped setting up this room by moving the desks around and connecting up the computers.  This took quite a long time but after setting them up, cleaning the desks and keyboards and checking the machines had network access we were all done.  We then did some work in the main classroom (which I quite fancy calling the Digital Media Lab) such as testing all the headphones and mics and binning the ones that don’t work.

Each workstation now has the pupils’ folders in a drawer and in the other drawer is a webcam, headphones, mic, pencils, pens and scissors.  At the back of the room we have two machines not allocated to pupils that have scanners so they can be shared.

I’m really hoping this works well!

Games promotions – posters

We were computer-less again today so we set off to the Art department to make posters to promote the Scratch computer games we’ve been developing.

We talked about the things a promotional poster for a game might need:

  • An eye-catching image
  • The name of the game in large lettering
  • The name of the developer or production company
  • Details of how to get the game (online or in shops) or a web address
  • Perhaps a certification rating
  • Release date (or perhaps “in stores now”)